hobbies
San Francisco Marathon - City Half (2025)
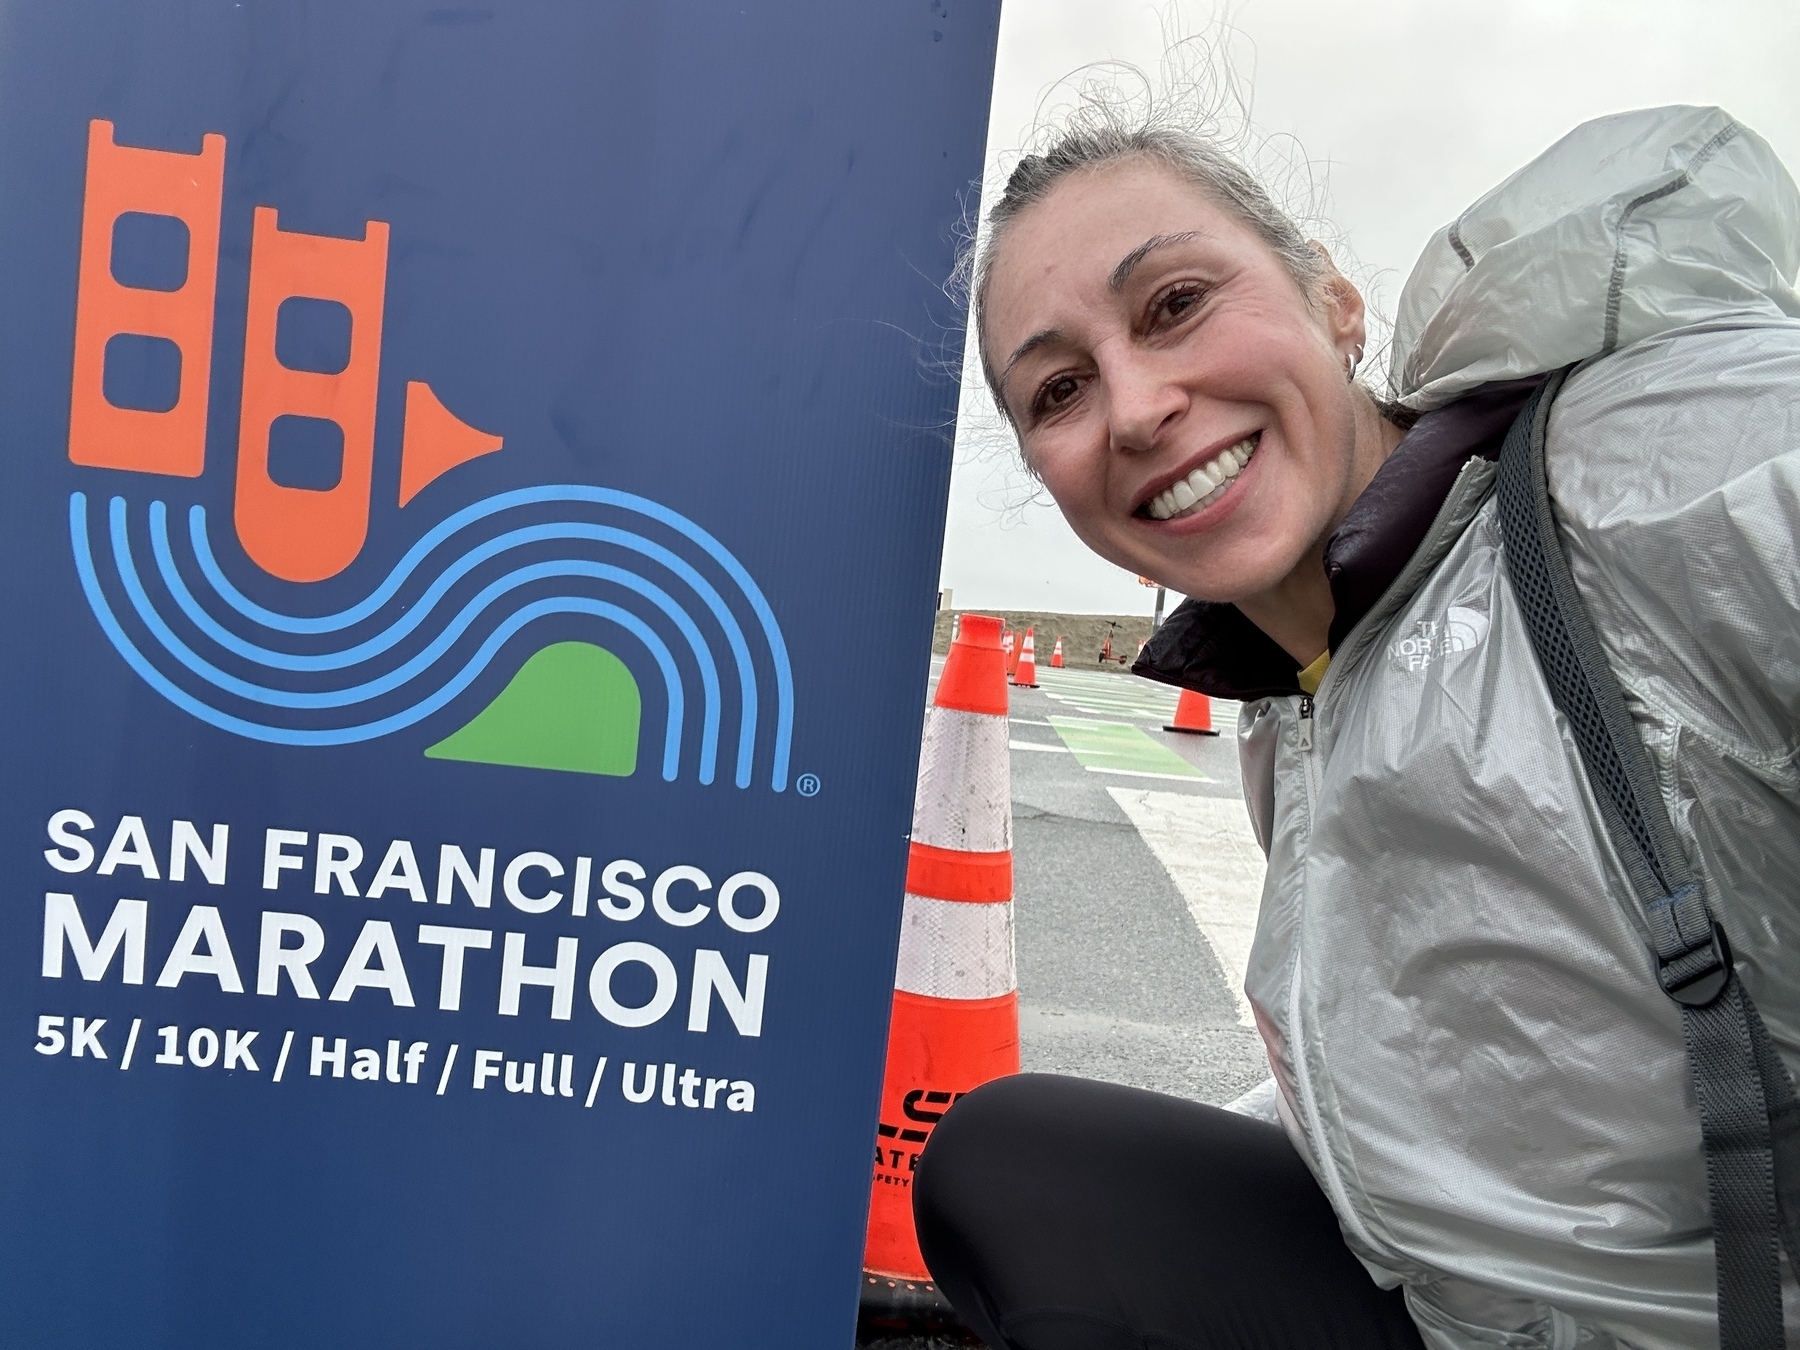
I ran the “City Half” of the San Francisco Marathon this weekend, which is the second half of the full marathon course. You can also opt to do the first half, which goes over the Golden Gate Bridge and back, but that’s the course I’ve done multiple times as part of the Golden Gate Half, which happens in November. The City Half has the advantage of a luxurious 8:30am start time (the first half starts at 7:00am, and the full marathon starts at 6:30am). I woke up before my alarm, which was nice, because the worst part of running a race is always having to get up at a ridiculous hour.

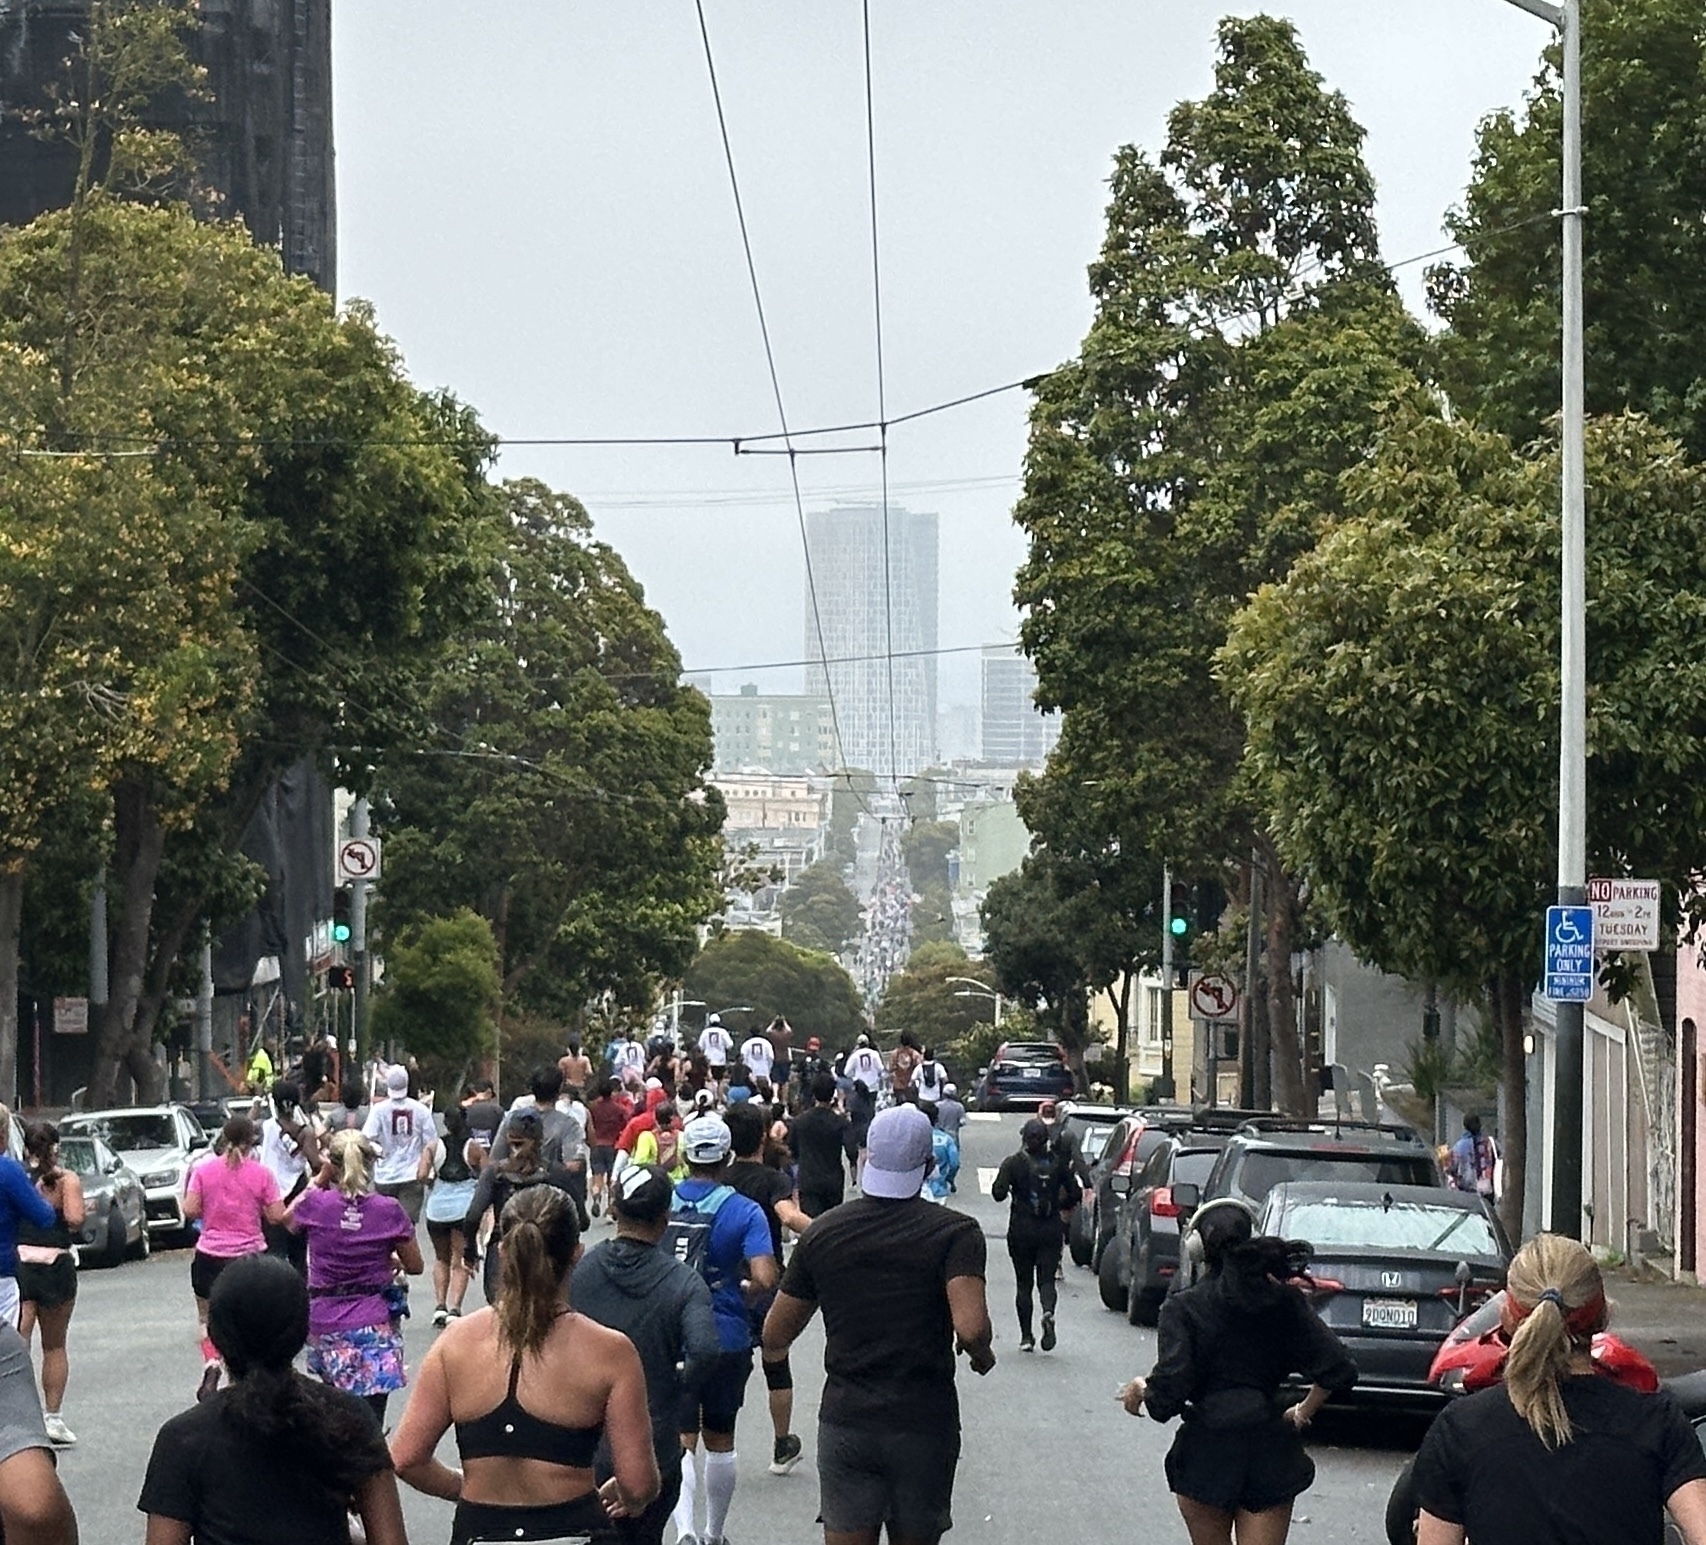
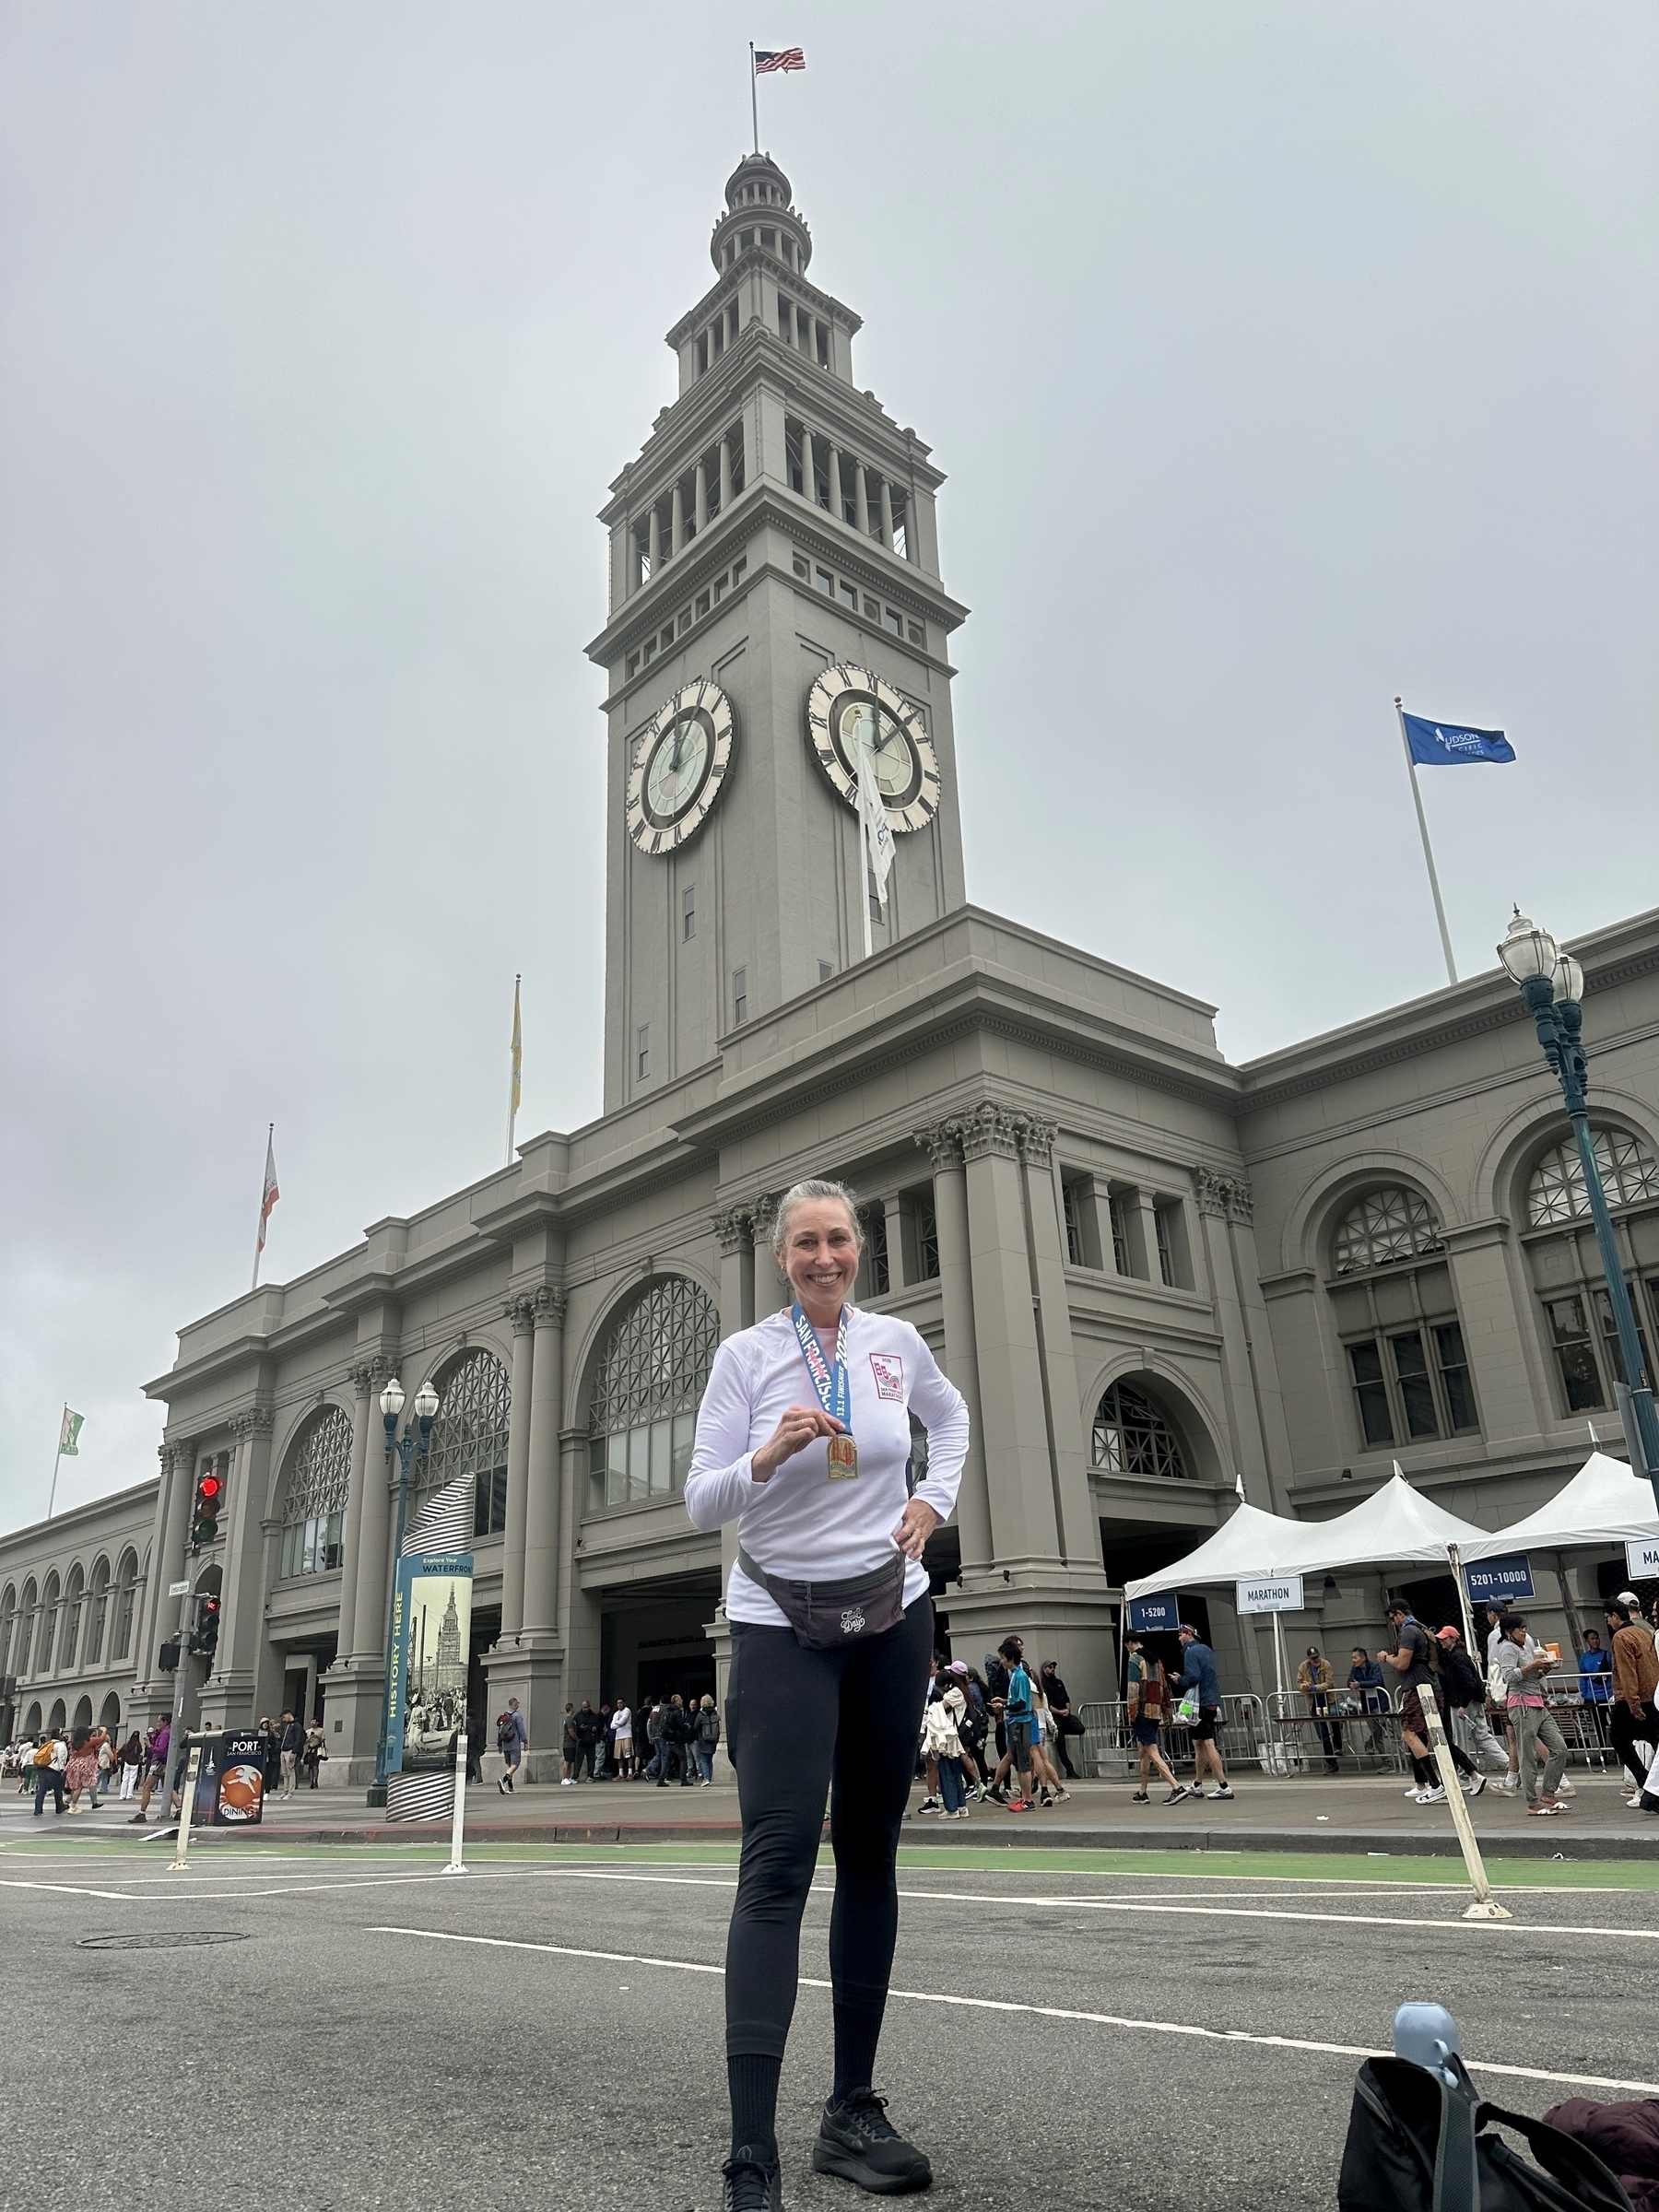
The course started at Ocean Beach, looped around Golden Gate Park, went southeast through Dogpatch, and ended at the Ferry Building. It was a very fun course, with only a few not-too-steep hills. It was very foggy, but not too cold, at the starting line.
A benefit of going through the city was that a lot more spectators than usual were out, given that it went through neighborhoods where people lived. My favorite was a guy playing a tuba in the middle of Guerrero, and someone with the sign “YOU’RE RUNNING BETTER THAN THE U.S. GOVERNMENT!” Running across it also really helps you appreciate how small San Francisco is.
Going down JFK Drive in Golden Gate Bridge also allowed me to see the now-finished sea serpent sculpture that’s near the Prayerbook Cross waterfall. It looked super cool!

I placed 19th in the women 50-54 category, but I’m always just trying to match or beat my previous time. The only bummer about the race was that it wasn’t particularly well-organized – there was only one sugar gel station that I saw (luckily I brought my own), and the gear pickup at the end was a disaster. We waited almost an hour to get our stuff! Anyway, it was still a great experience, and I have another finisher medal for my shelf.
Distance Running
I’m currently training for my 6th half-marathon, the San Francisco Second Half, in July. I usually only do them every couple of years, to make sure I still can, but I’d been wanting to do this race for a while and it always sells out. This year, a co-worker happened to alert me that sign-ups had just opened, so I went ahead and reserved my place. Since I just did the Golden Gate Half (for the third time) last November, I figured I’d just keep up my level of training rather than going back to “normal” and training up again.
Usually when I’m training for a race from scratch, I use the Hal Higdon “Intermediate 1” program. It’s doable with a job, except when you get to about week 7 and you’re doing 7-8 mile runs on a Wednesday. I work out in the morning, so that means getting up at something like 4:30am to do a long run, which isn’t great. This time, I’m just maintaining my regular running schedule, which is generally 4-5 mile runs on Sunday, Tuesday, and Wednesday, and then a 10-12 mile run on Friday (or over the weekend if I can’t get to it on Friday). On the other days, I do yoga or strength training.
I’m trying a new approach this time, which is focused on increasing muscle. I’m doing heavy lifting (heavy for me!) inspired by the “Hit Play Not Pause” podcast, which is geared towards athletic women in perimenopause or menopause. The host talks quite a bit about how women tend to start to lose muscle at our age, and we have to really work to retain it. I bought Bowflex adjustable dumbbells last year (which are fantastic!) and am trying to steadily increase the weights I’m using (I track it via the free Strong app).
I’ve also significantly increased my protein intake, aiming for 1.6g per kg of body weight, which is about 120g/day for me. I eat Greek yogurt every day, nuts, and hardboiled eggs, but I also try to get 3 scoops of protein powder over the course of the day. I was getting whey-based powders because I thought that was all there was, but there is a vegan powder from Naked that I’ve been trying, which is pretty good. I get around 50-60g from stuff I normally eat and then ~70g from protein powder.
I started this approach around the beginning of this year, and my scale (who knows how accurate it is) thinks I’ve gone from 58.2% muscle to 62.8%, so I feel pretty good about that! We’ll see if it impacts my race time.
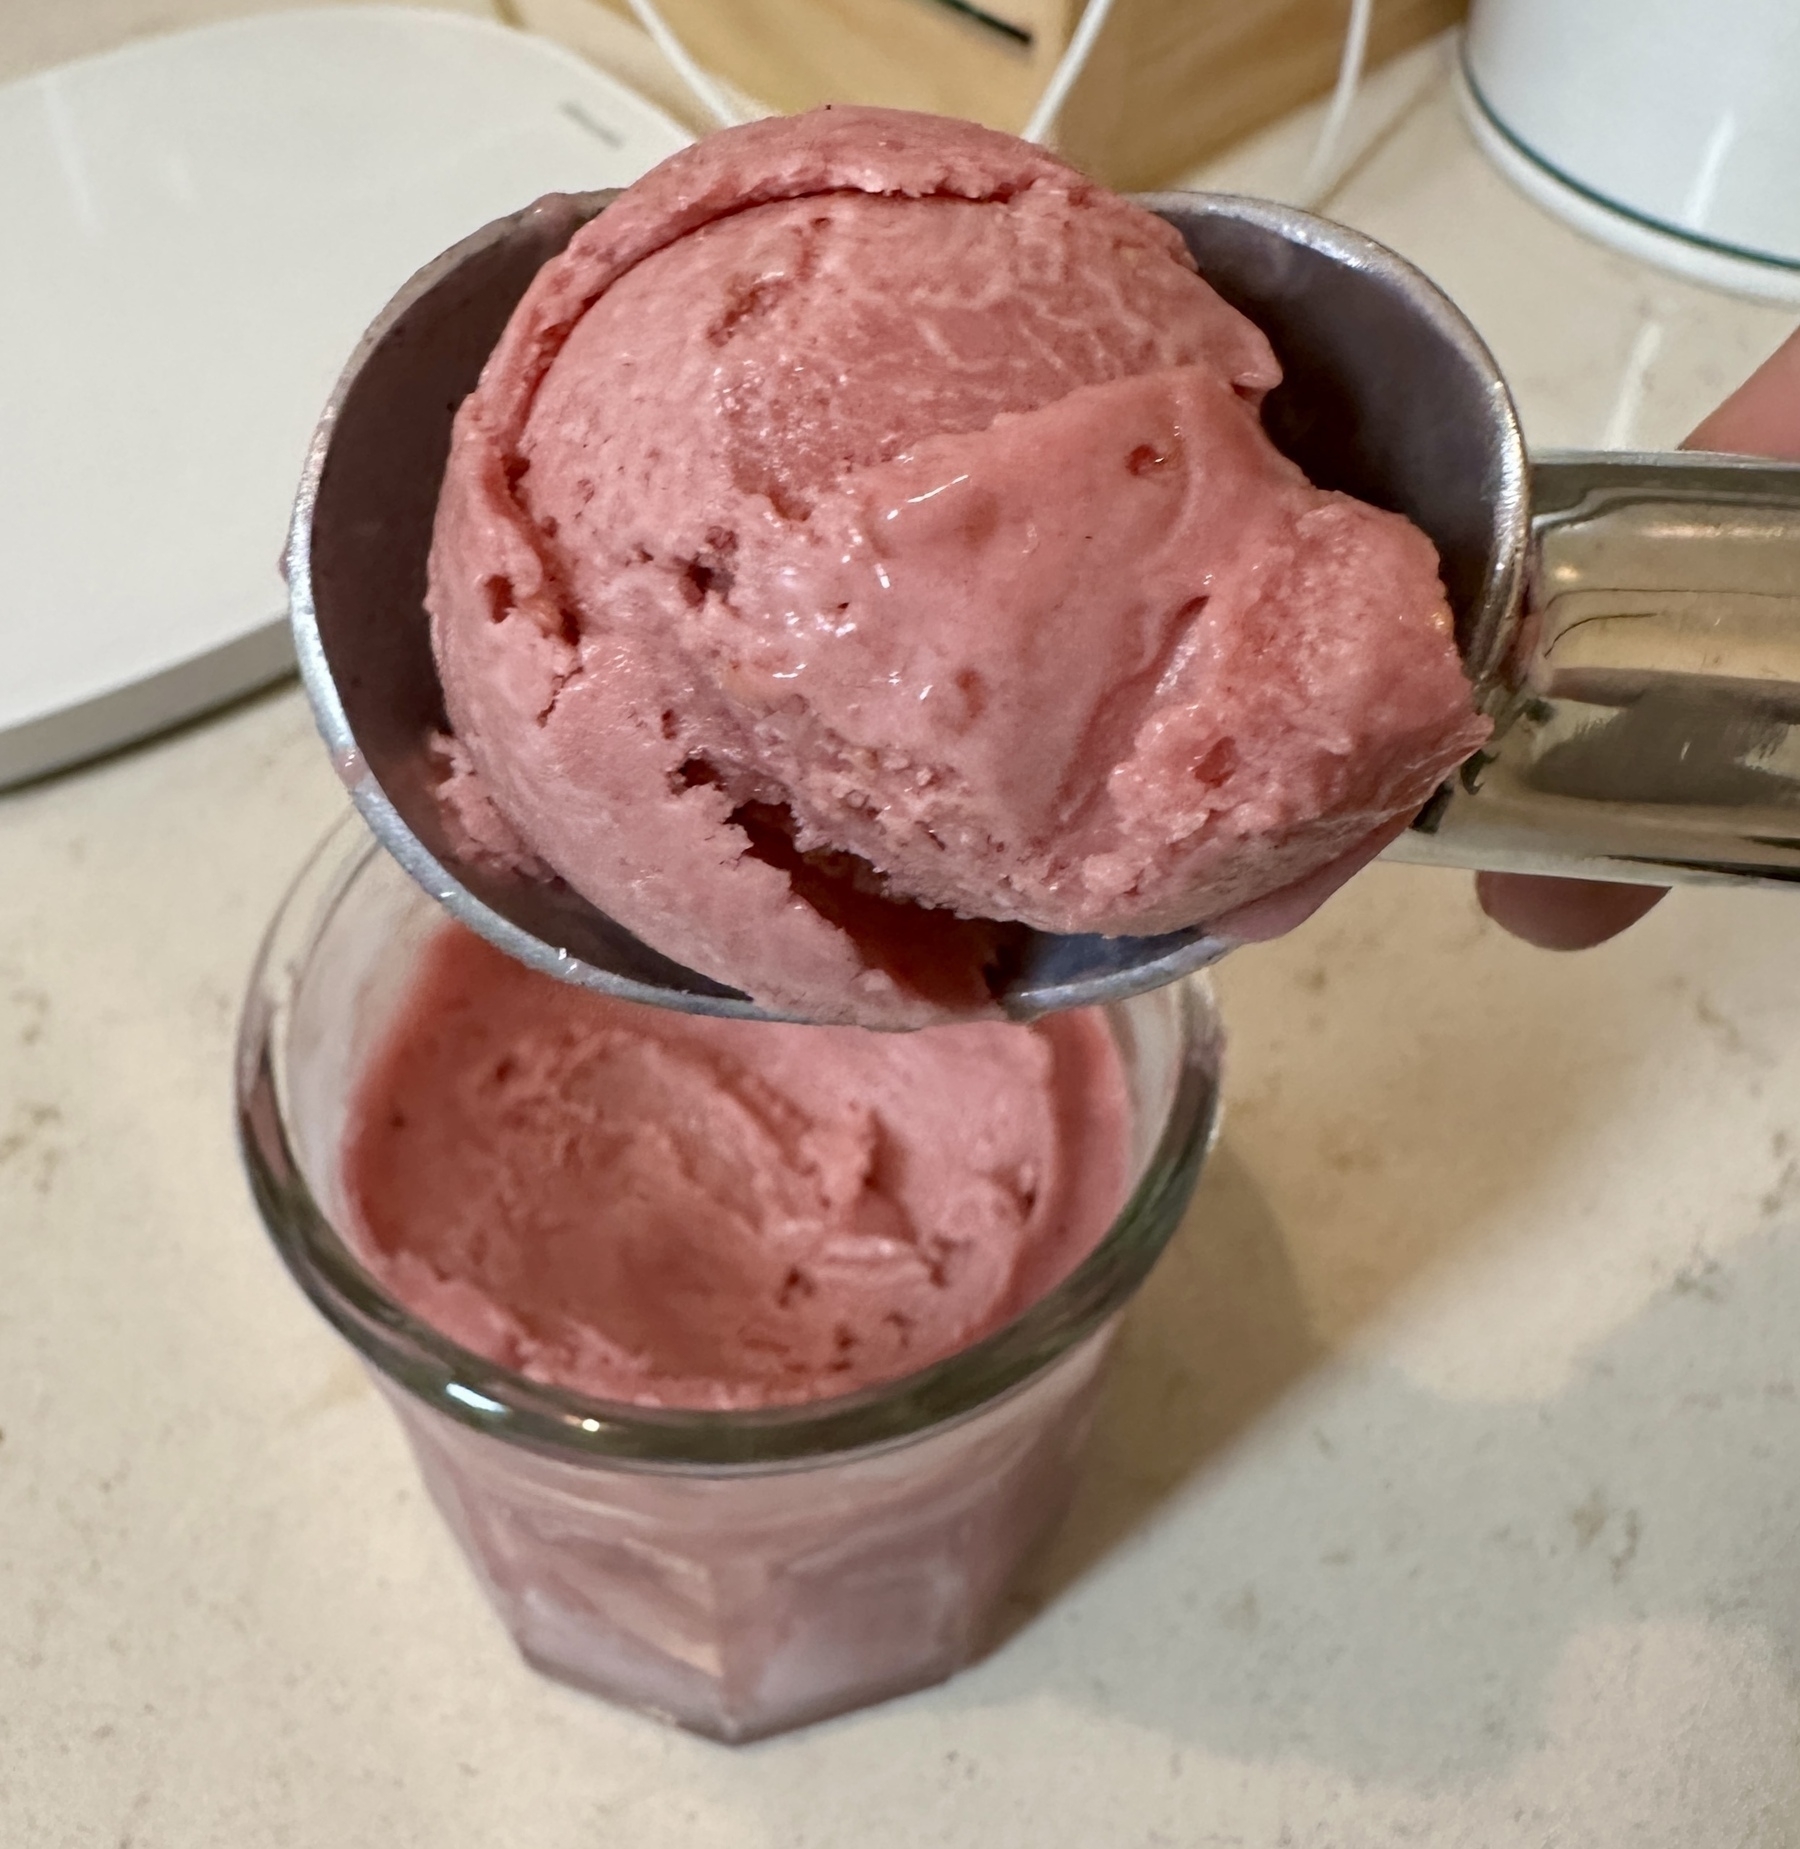
Vegan Ice Cream Experiment #4
I made another attempt at a vegan ice cream, this time adapted from this Underbelly recipe. The ingredients I used are:
The main differences from the Underbelly recipe are:
(1) I bought cashew milk rather than making it myself. I used the Forager Project brand, which doesn’t contain any extra ingredients, aside from a little bit of oats and salt.
(2) I substituted 2.25g of locust bean gum for his recommended 2.25g of carboxymethyl cellulose, since I didn’t have that on hand. I recognized later that this is probably a failure, as the batch isn’t cooked, so the LBG won’t be activated.
(3) I substituted extra guar gum for his recommended 1.5g of gum arabic, since I didn’t have that either.
(4) Since I didn’t have either of trehalose (10g) or powdered glucose DE40 (60g), I substituted 70g of powdered glucose DE42.
(5) I increased the amount of sugar from 105g to 120g, since Underbelly often complains that most ice creams are “too sweet” (which is, obviously, wrong!) and I wanted to correct for it not being sweet enough.
I flavored it with my standard raspberry flavoring, which is made by buying a 340g bag of frozen raspberries and cooking them on low until they are nice and jammy. Then I used the stick blender to blend them all together. The deodorized/refined coconut oil was new to me, it doesn’t have the coconutty smell/flavor, so makes for a more neutral base.
This turned out more like a sorbet than the ice cream feel I’m going for, although the flavor was good. I’d like to try this recipe again, but with his recommended ingredients (all can be ordered on Amazon), and think about how to make it creamier (maybe more inulin?). The addition of inulin was something I wouldn’t have come up with myself, but Underbelly recommends it as a way to add a creamy “mouthfeel” without the milkfat, even though inulin is a starch and not a fat.

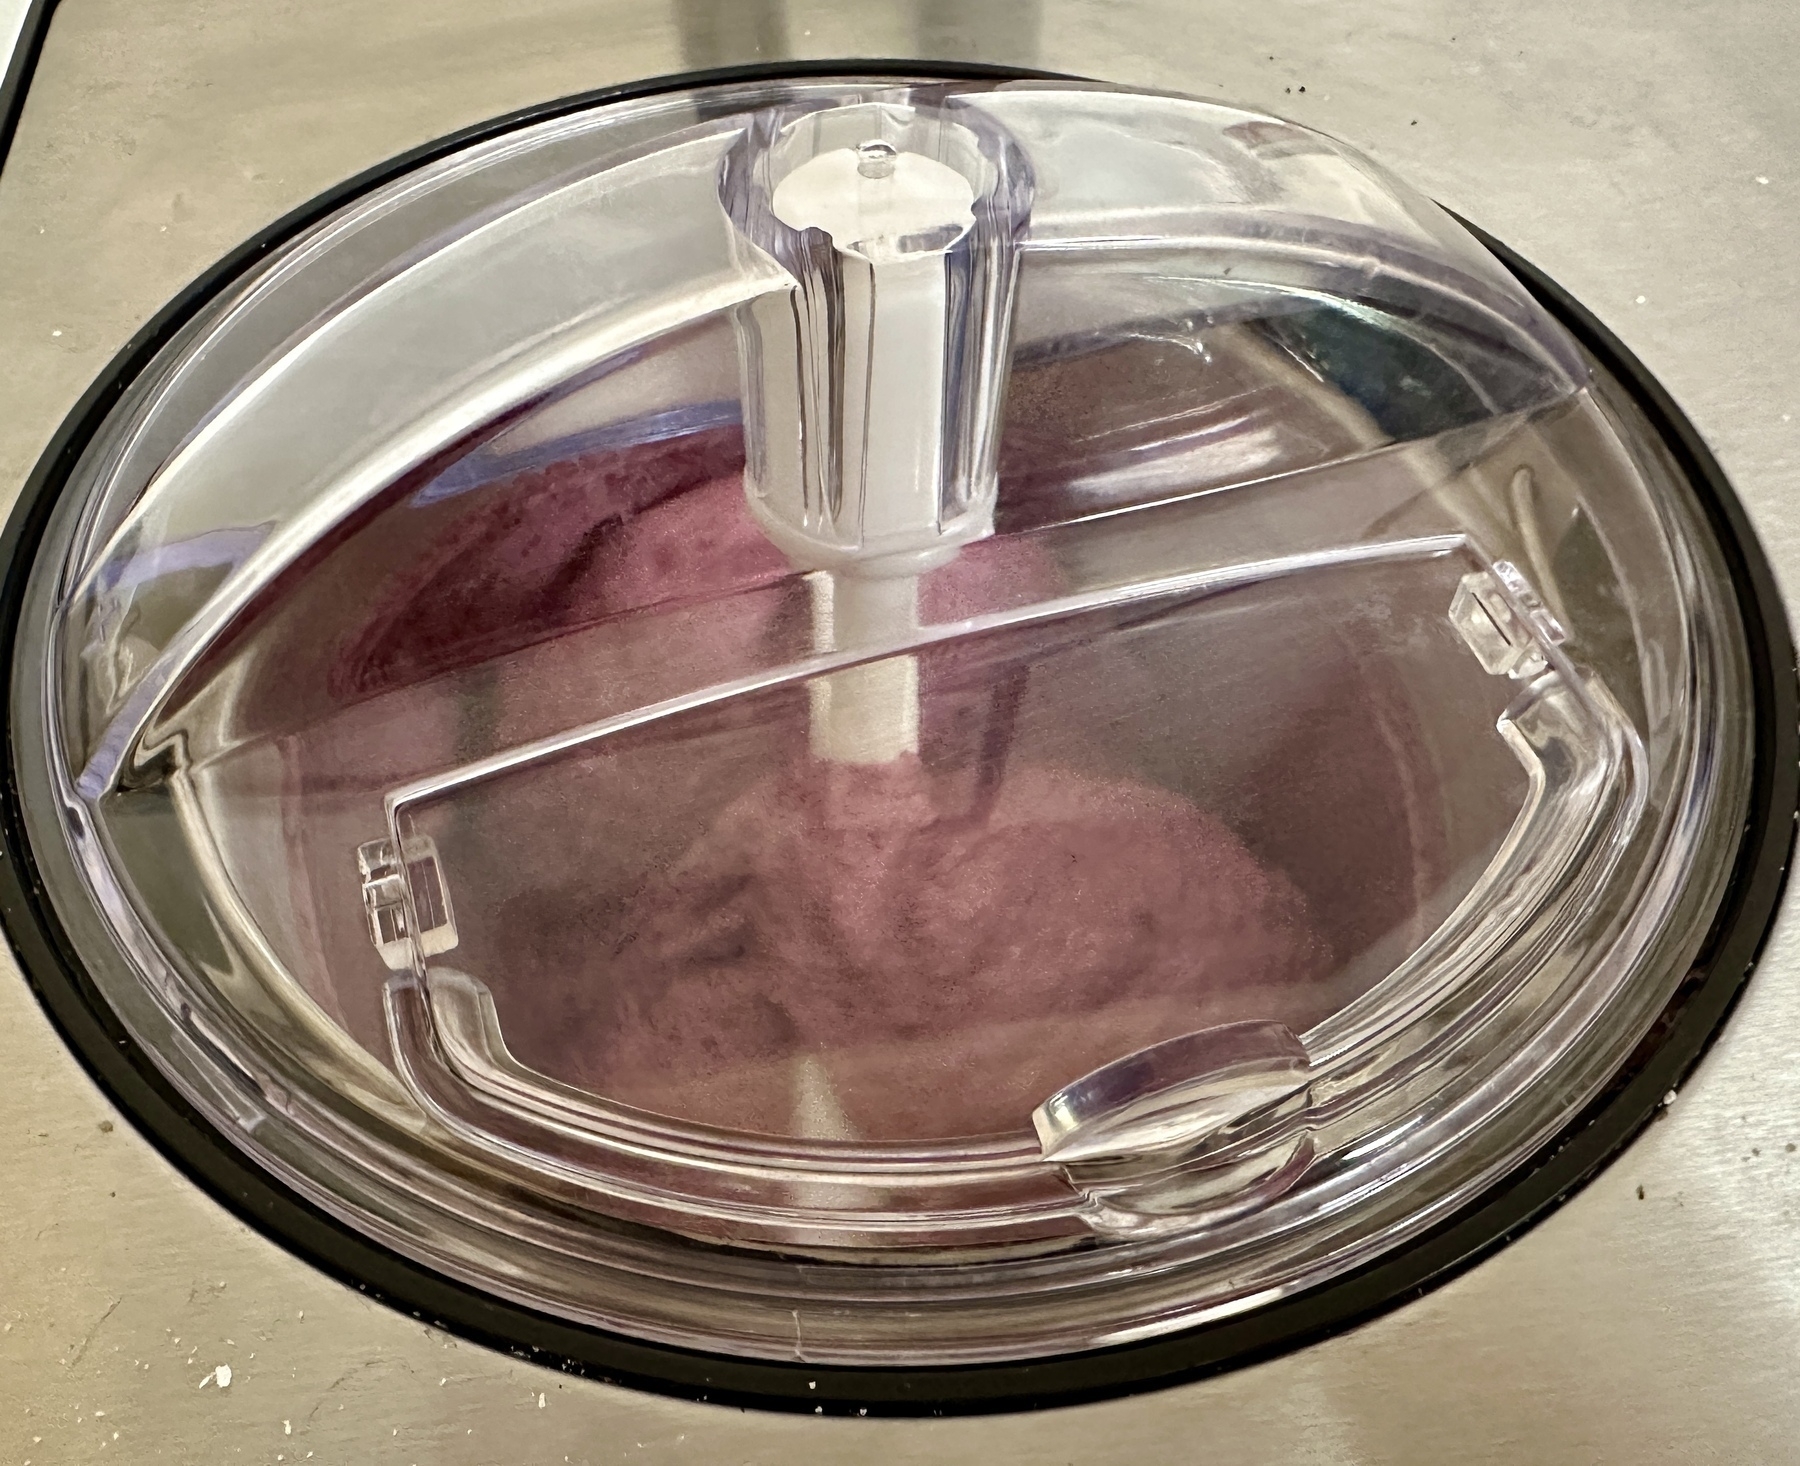
Vegan Ice Cream Experiment #3
Unfortunately, I learned that I can only buy Califia non-dairy Heavy Whip at Rainbow Grocery, which is a pain to get to, so I decided to improvise. Working off of the results from my last attempt at vegan ice cream, which was based on my regular ice cream base recipe, I got Silk brand creamer (which did not have enough fat in it) and added 60g of cocoa butter to bring it closer to the fat content in heavy whipping cream (doing the math, it should have been 119g, but that seemed like too much). I also added 50 additional grams of light corn syrup to improve the scoopability. As usual, for the raspberry flavoring, I cooked 340g of raspberries on low until they became jammy.
Ingredients list:
- 340g Oatly full fat oat milk
- 460g Silk Original Creamer
- 60g cocoa butter (bought in bulk at Rainbow)
- 12g soy lecithin
- 60g NOW coconut milk powder for milk powder
- 200g sugar
- 100g corn syrup
- ⅛ tsp. Locust bean gum
- ¼ tsp. Guar gum
- Pinch of salt
- 340g raspberries (cooked separately)
It really seemed like it had too much water in it, so I let the base simmer for about 30 minutes to thicken it up. It was still very liquidy going into the machine, as well as coming out. But the ultimate texture was scoopable right out of the freezer, so a big improvement over prior batches. Unfortunately, the cocoa butter flavor was very strong, and almost drowned out the raspberry. I need to find a way to add vegan fat that’s not cocoa butter and isn’t coconut either (which also has a very strong flavor). I think I’ll go get the Califia Heavy Whip and try using that for the next batch.
Meanwhile, I’m going to bring it over to my vegan friend Nico’s today and see what he thinks.
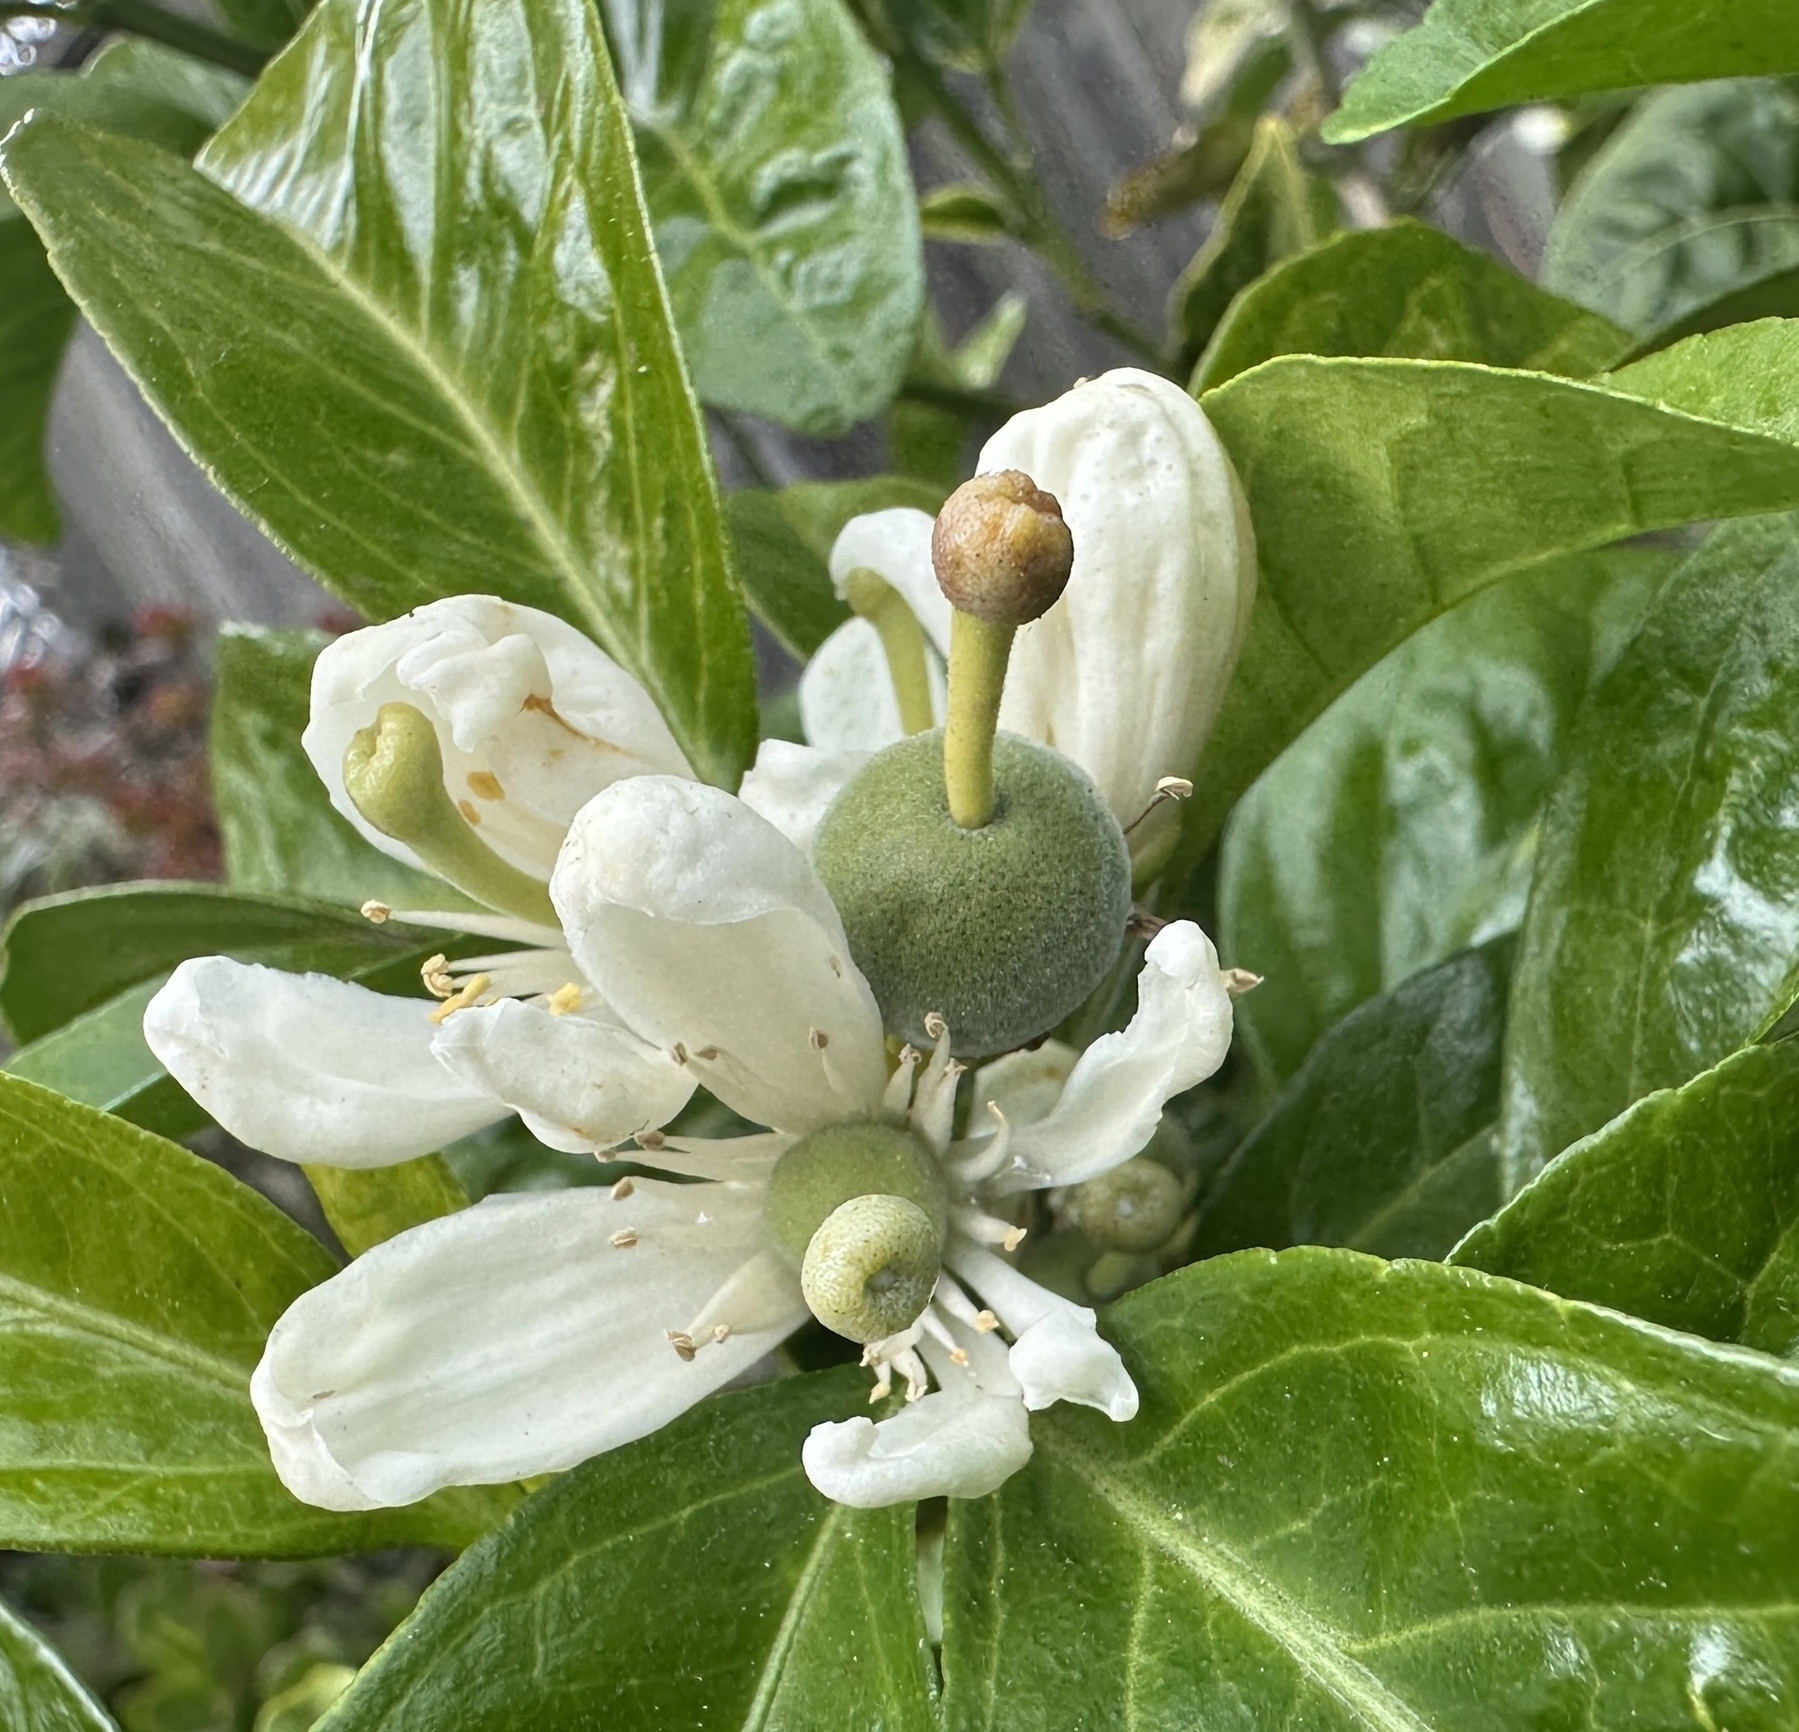
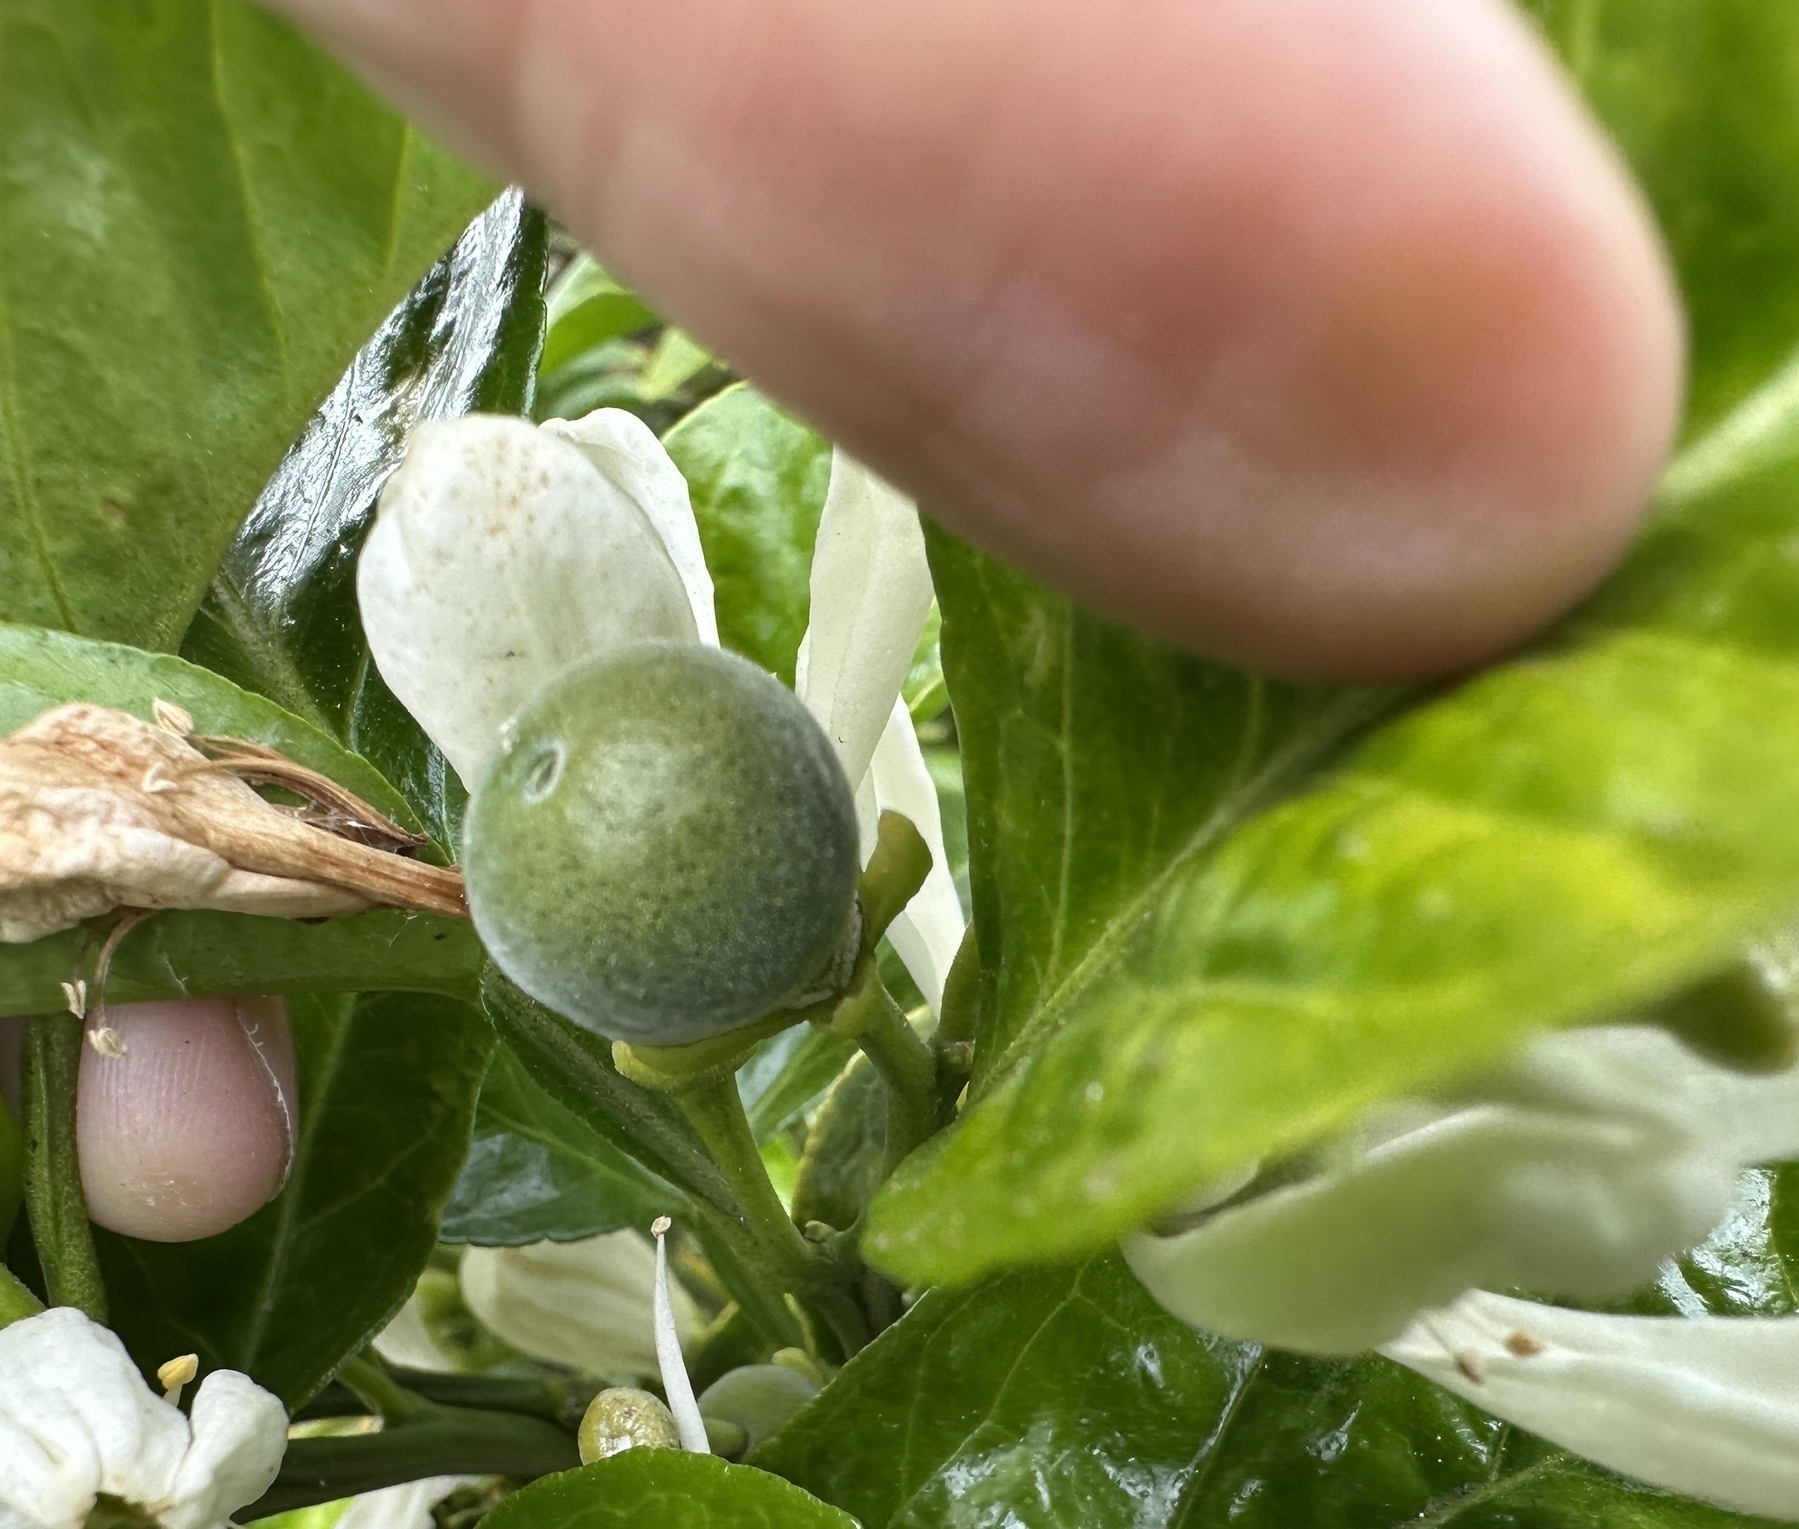
The 10-Year Odyssey of the Mystery Citrus
For friends who have been following the nearly 10-year odyssey of my MYSTERY CITRUS* tree, I’m excited to report that there are a few tiny, nascent, round fruits appearing on it! Please cross your fingers that they finally make it to ripeness!
*When we bought this house in 2015, there was a small, almost-dead tree that I thought was a lemon tree. It was completely shaded by a huge eucalyptus that was threatening to fall over, and which we quickly had removed. In the removal, they damaged the “lemon” tree further. I decided, now that the tree was actually getting sunlight, that I could bring it back to health.
For FIVE years I fertilized it, watered it, and protected it with a frost blanket when it got below freezing at night. It actually started having some healthy growth. But no fruit. I assumed it was just building up its strength again. Finally, it produced a handful of small fruits, which I was surprised to see were ROUND! But they dropped off the tree while they were still tiny and green, so it was impossible to tell what they were. They obviously weren’t lemons.
In year 6, I was excited to see that it had many small fruits on it, and I had hope that this would FINALLY be the year in which it would keep the fruit on the tree until it ripened, and we could find out what it is. Unfortunately, it was attacked by rats during the night (same thing that happened here), and they not only ate ALL THE LEAVES but also much of the bark off the tree. I had no idea that could happen. Any remaining fruits dropped off. I didn’t know if the tree would survive.
But that little sucker kept hanging on, and during years 7 and 8 it just kept growing more branches and leaves, presumably replenishing its stores of energy, and didn’t produce any fruit. So you can see why I am so excited that now in the 9th year, we may actually see some fruit. I’m crossing my fingers. My guess is that it’s a mandarin orange. But we shall see.

Vegan Ice Cream Experiment #2
For this attempt, a mixed berry batch, I used my normal base recipe, but substituted all vegan ingredients:
- 340g Forage brand cashew milk (left over from last recipe) - substitute for whole milk
- 460g Califia Farms Heavy Whip - substitute for heavy whipping cream
- I would have used 12g soy lecithin to substitute for the egg yolks, but didn’t have any, so I used 1g of xanthan gum
- 60g NOW brand coconut milk powder for milk powder
- 200g sugar
- 50g corn syrup
- ⅛ tsp. Locust bean gum
- ¼ tsp. Guar gum
- Pinch of salt
Then, as I would for any berry ice cream, I took 340g of frozen berries and cooked them for about an hour on low on the stovetop, until they were nice and jammy, blended them separately with the immersion blender, then blended them into the base.
I think this recipe was on the right track. For how little coconut is being used, I’m still surprised at how much it tastes like coconut. It was still a little hard, and not creamy enough, so I think I need to use a creamier plant-based milk (I’ve heard barista-style oat milk is a good substitute), some dehydrated glucose in addition to the corn syrup (maybe 50g?), and maybe a little cocoa butter (20g?). But I feel like I’m in the ballpark and will be able to improve on this.
How to Discover New Music in Your 50s
A lot of these posts end up being responses to questions I get asked often, so I think I’m writing them to memorialize the answers somewhere, so that after I’m gone, the “wisdom” (???) will live forever somewhere, on the internet, where nothing ever dies.
Adam and I have been recording a music podcast for 11 years — we’re currently at 230-something episodes — in which we find one recently-released album to discuss in depth. I do most of the work of finding potential candidates, because I already spend a lot of time and energy on discovering new music. People sometimes ask how I discover new music, because they find themselves listening to the same old albums over and over again. I always say, first off, that it kind of has to be a hobby that you’re willing to devote time to, and if your main hobbies are raising children and/or working too much, it might just have to be something you leave behind for the time being (or just listen to your friend Gaelen’s recommendations!). ;) Anyway, here are my methods:
REVIEWS AND BLOGS
I follow a lot of websites (via RSS or social media, like Bluesky) that review and recommend music. I’ve gotten pretty good at being able to read a review and determine if it’s something I’m probably going to like. Sites I read religiously are Pitchfork’s new album reviews, Stereogum’s “Heavy Rotation” section, Paste Magazine’s Music section, and the See/Saw “Punk This Week” newsletter. Sites I read less religiously are NPR Music, the “indieheads” subreddit, Rolling Stone, and Brooklyn Vegan.
PODCASTS
I listen to a few music review podcasts, including All Songs Considered, See/Saw, Rolling Stone Music Now, and KEXP’s In Our Headphones. Of course, I think Adam’s and my own podcast, For the Record, is a pretty good listen!
RADIO STATION PLAYLISTS
I don’t actually listen to the radio much, but I look at certain radio station’s charts to see what’s popping up. In particular: KEXP, BFF.fm, and KCRW.
LIVE MUSIC
For more than a decade, my biggest avenue of musical discovery has been going to the South by Southwest music conference in Austin, Texas every year. SXSW is not a “festival” the way most people think of it, it’s about 1,000 mostly-unknown bands coming from around the world to play at roughly 100 small venues across Austin, to industry people and tastemakers. I spend months in advance listening to the artists who have been invited, and deciding, on the basis of a handful of songs, whether to add them to our schedule. We can usually only see 90-100 artists over the course of the week, but I always leave with new discoveries I’m really excited about. Unfortunately, they are significantly scaling down the music portion of SXSW next year, and making the whole thing overlap with SXSW “Interactive,” which is all the worst tech bros with whom I hate having to share space for the one night it had previously overlapped. So the future is uncertain.
Here at home, I look through the music calendars of every local venue once a month, and put the ones that I think I or my friends might be interested in into a shared Google doc. When someone I’m interested in comes to town, I try and see them live.
PLAYLISTS
Certain radio stations and programs, like NPR’s All Songs Considered, curate “New Music” playlists on Spotify that you can follow. Personally, I have my own “Current Rotation” playlist, which is pretty much all I listen to. As I gather music from the above sources, it goes onto the playlist, and what doesn’t resonate with me gets removed in regular prunings. You can “follow” it on Spotify if you want to see what I’m listening to.
The Big Salad and Avocado Achievements
Every night, Adam and I have a “Big Salad” for dinner. It varies based on what add-ins we cooked over the weekend or got at the farmers’ market, but generally consists of greens, carrots, feta, nuts, the amazing baked tofu that Adam preps on the weekends, chia seeds, tomato, a hardboiled egg, and avocado.
Adam always chops the avocado, and takes great pains to make sure the chopped avocado coheres together in its original shape. This is difficult to do! But he takes great pride in getting it close to perfect.
Tonight’s avocado was rated a 9.5 out of 10, which is the highest rating ever achieved, so I wanted to document it.
Look upon his works, ye mighty, and despair:

Knitting: “Love Note Sweater” from Tin Can Knits
I recently started knitting sweaters again, which I hadn’t done in about 20 years (I’ve still been knitting a bit, but I’ve stuck to baby blankets, scarves, and afghans, mostly as gifts). I recently completed my second sweater, the “Love Note Sweater” from Tin Can Knits. The pattern is available here for $9, and what I particularly love about Tin Can Knits is that they have an iPhone app, which allows you to select your size, and then it shows you ONLY the instructions for your size. Super useful, and makes following the pattern much easier. You can also enter your own personal notes.
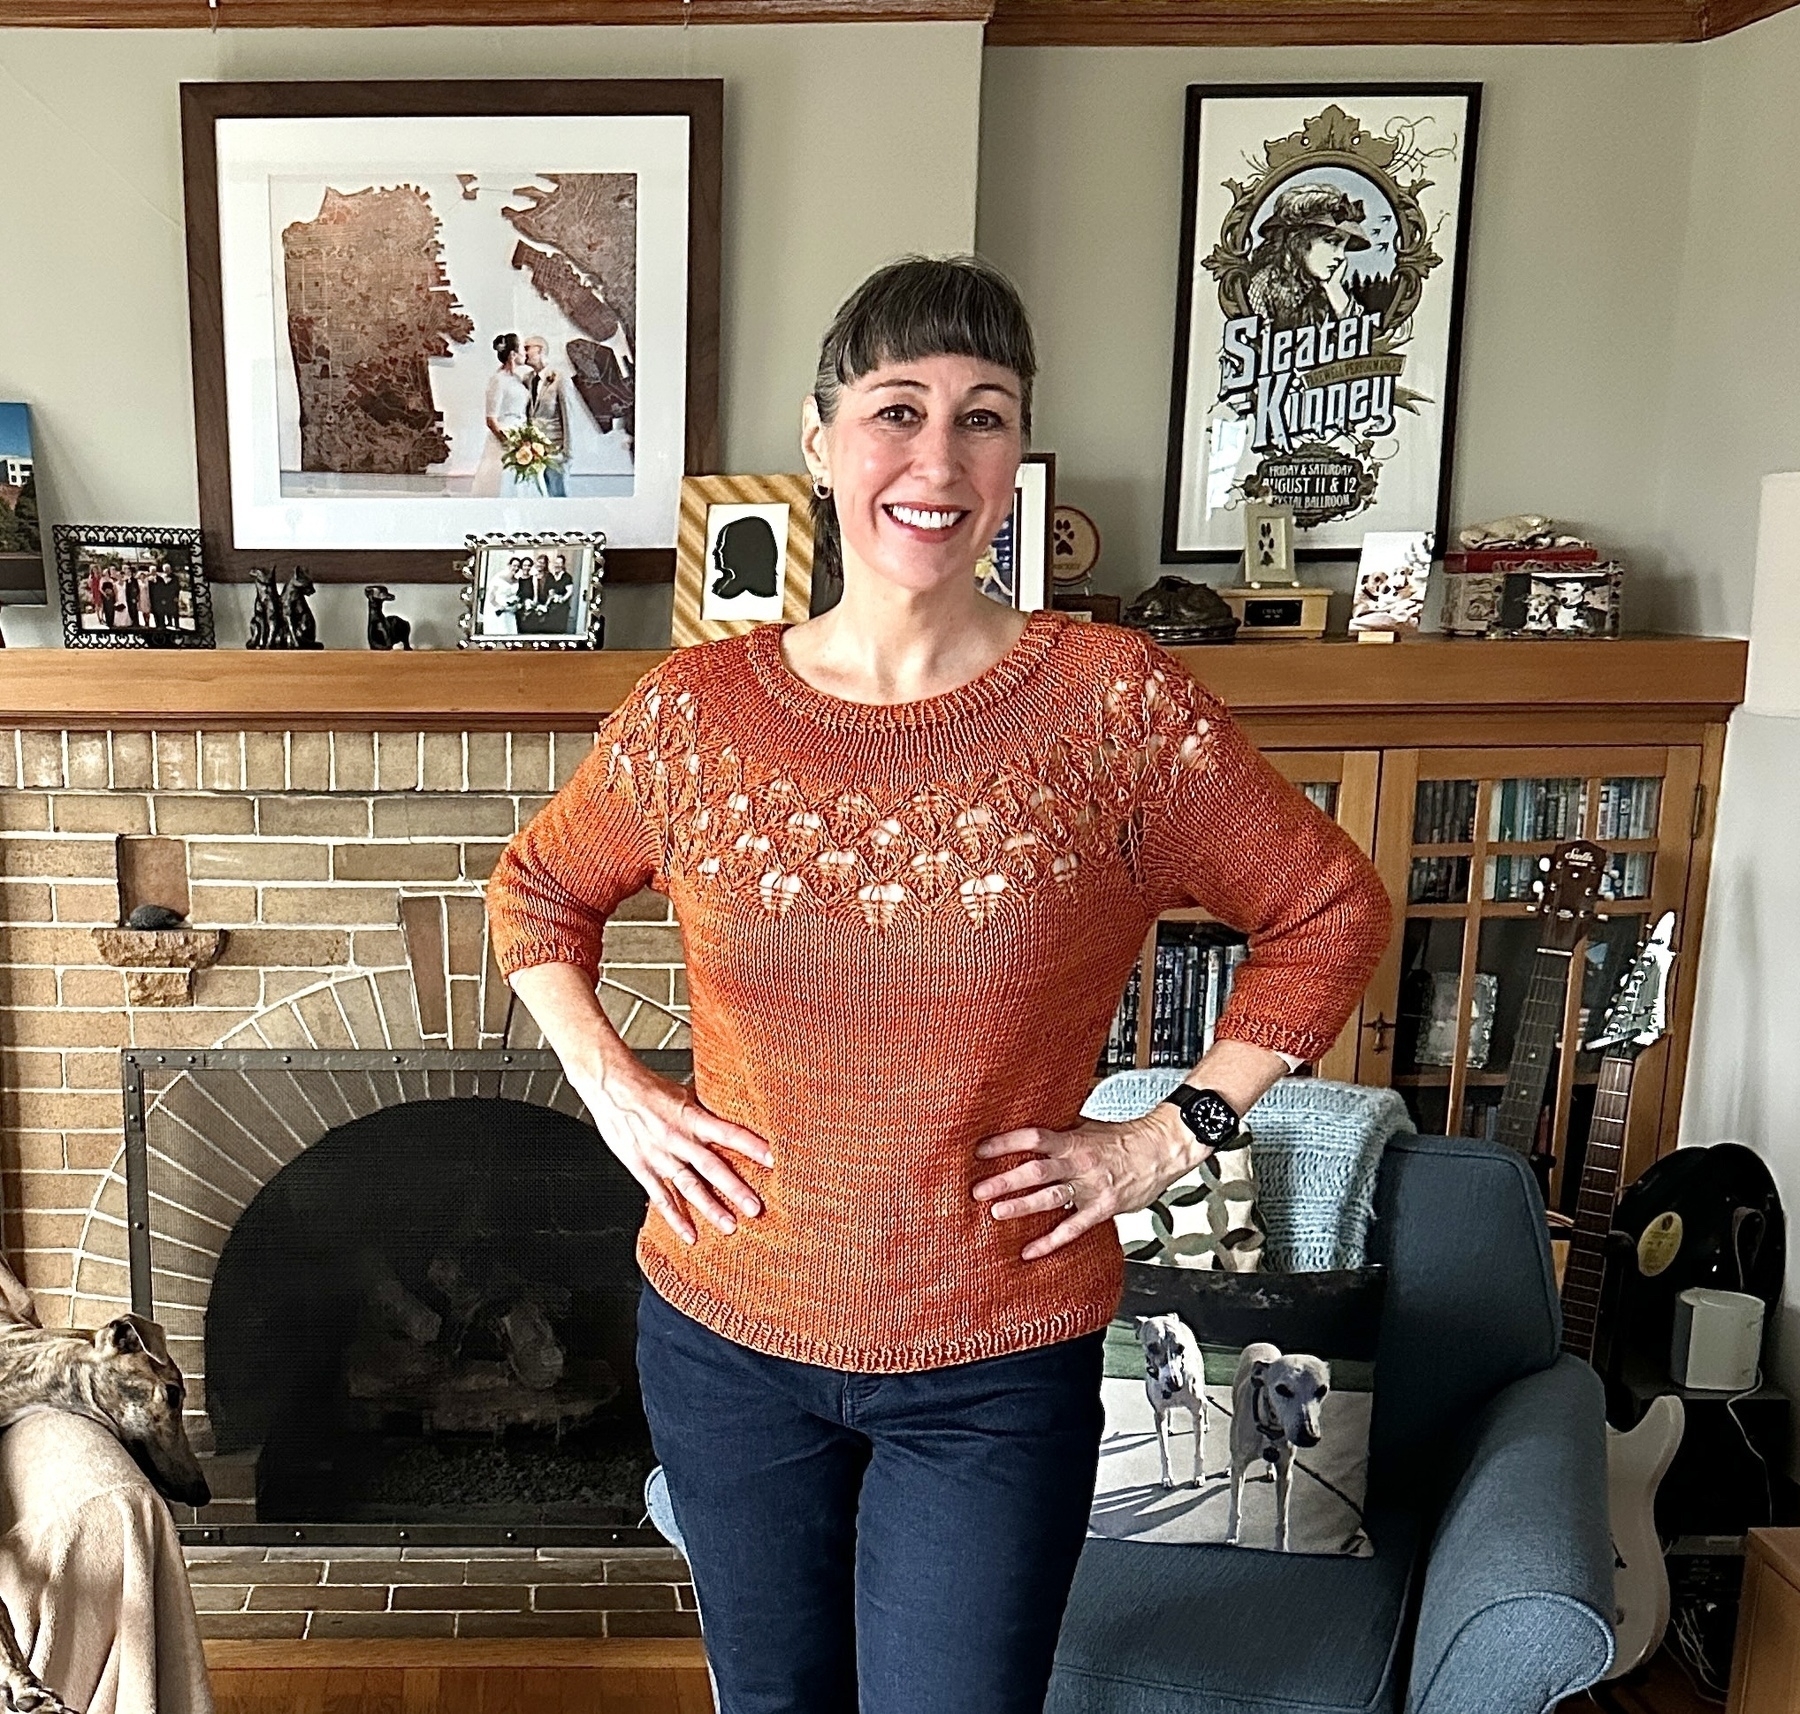
I chose this design after seeing an already-knit example in my friend Kelley’s yarn shop, The Royal Bee Yarn Company, and selected one of her own DK-weight yarns to create it. The color is “Luscious Marmalade Lantana.” Kelley’s yarns are non-superwash merino wool, so they feel great on your hands while knitting, and produce a beautiful garment. Because they’re hand-dyed, even the “solid” colors have a little variation to them, which I think looks great. I love Kelley, so it’s also nice to carry a little bit of her with me when I wear it.
Skill-wise, this project was a bit challenging for me. It’s knit from the top down, and I had to restart the project 3 times. The first time, I made what, in retrospect, is an obvious mistake: Because the lace pattern consists of increases and decreases that net out to zero each time the repeat completes, I didn’t think about the fact that if I ended the pattern in the wrong spot, I might be adding or subtracting a stitch, throwing the entire pattern off. So I started again a second time, but I still kept making mistakes in the lace pattern (this time I stopped and re-started more quickly!). The third time was the charm: I made a couple of small mistakes in the lace pattern, but I think only I would have noticed them.
I generally find sweaters to be too short, so I added 6 inches to the body length, and I added a couple of inches each to the sleeves. I intended for them to reach to the wrist, which obviously isn’t quite the case. At least they are even! I also dropped the “high-low” hem at the bottom, which I generally don’t like, and made the hem even. I’m really happy with how it turned out.
How to Make Perfect Homemade Ice Cream
During the beginning of COVID lockdown, I started making homemade ice cream. But, like most homemade ice cream, it wasn’t that great! I LOVE ice cream, so I decided I was going to set out to make the BEST ice cream, better than you can buy in a store. Learning the science and experimenting with different recipes became my COVID hobby.
More than 400 batches later, I have achieved my goal. Friends tell me I make the best ice cream they’ve ever had. I’m able to make some of my favorite flavors that you can’t buy commercially, like real banana, and unexpectedly delicious combinations, like matcha with Grape-Nuts as a mix-in (trust me!).
Let’s get a few things out of the way first:
-
You need an ice cream maker to make ice cream. Don’t bother with so-called “no churn” recipes. The texture won’t be good. That being said, a basic freezer-bowl style Cuisinart ice cream machine is fine, and that’s what I started out with. I ended up upgrading to a compressor-style Whynter machine, but only because I wanted to be able to make more than one batch per day and wanted a bowl with a larger capacity. The quality of the ice cream wasn’t any different.
-
Ice cream, like baking, is based on chemistry. Each ingredient serves a purpose: Sugar lowers the freezing point, emulsifiers smooth the texture, milk solids give it “body,” fat creates the creamy mouthfeel. You can’t just throw ingredients together in any amount and expect it to come out well. You also can’t try nonsense like leaving out the sugar (unless you want a frozen ice block). If you want to learn more about the science, I highly recommend the book “Hello My Name is Ice Cream.” The website Ice Cream Science is also a great resource.
-
Once you have a good base recipe, you can learn to adapt it to different flavors. If you’re just adding a flavor agent, like vanilla, there’s no need to adjust. But if you’re adding, for example, strawberries, you’ll need to account for the fact that strawberries add sugar, non-milk solids, and water, and adjust accordingly. That will come from experience and experimentation. There are also ice cream calculators available online that you can use.
-
Keep it simple. Other recipes will overcomplicate things and tell you to temper the egg yolks, etc. You don’t need to do any of that. Just follow my method. You can get the stabilizers — Locust Bean Gum and Guar Gum — on Amazon, they’re not expensive, or you can use some other stabilizer (I used to swear by Cremodan 30, but they stopped making it). You can also do without any stabilizer, it will just mean the ice cream won’t keep as long in the freezer before it gets icy. I like my batches to last at least a few weeks.
**Ok, now for the base recipe: **
This is the “base” recipe all my flavors are built around. I’ll provide some of my specific recipes down below, but with a good base recipe, it provides a solid ground for experimentation. You’ll need a digital kitchen scale and a candy thermometer.
-
For certain flavors, prepare the milk and cream a day in advance by bringing it to a boil with the flavoring items (mint leaves, coffee beans, tea, etc.) and letting it sit together in the fridge overnight. Strain out the solids before using the flavored dairy.
-
Separate 3 large eggs (the yolks should be about 60g in weight, total). Just keep the yolks. With bird flu causing supply issues with real eggs, I’ve also used powdered egg yolks and reconstituted them with water per the directions.
-
Prepare an ice bath by nesting a smaller bowl (large enough to hold all the ice cream mixture) in a larger bowl of ice.
-
Add the following dry ingredients in a bowl (put the bowl on the kitchen scale), and stir them together thoroughly:
- Table sugar: 200g
- Skim milk powder: 60g
- 0.8g locust bean gum (1/4 teaspoon)
- 0.5g guar gum (1/8 teaspoon)
- Any powdered flavorings you want to use (cinnamon, cardamom, etc.)
- A pinch of salt
- Put the following wet ingredients in the saucepan and mix thoroughly:
- Whole milk: 340g
- Heavy whipping cream: 460g
- Light corn syrup: 50g
- The 3 egg yolks (use a fork or whisk to break them up)
-
Slowly add the dry ingredients to the wet ingredients, whisking constantly, until everything is dissolved. You can use an immersion blender if you feel like it.
-
Put the scale away and get out a candy thermometer. Attach the candy thermometer to the side of the saucepan.
-
Turn on the heat to medium-high and begin stirring almost constantly, with a silicone spatula so that you can keep scraping the sides/bottom, until the temperature reaches 180 degrees (10 minutes or so).BE CAREFUL NOT TO OVERCOOK OR THE EGGS WILL SCRAMBLE! The temp needs to be raised to 180 degrees to activate the locust bean gum. If you don’t have a candy thermometer, just watch until it starts to steam visibly. If not using stabilizers, you just want to pasteurize the eggs.
-
Turn off heat and continue stirring for a few more minutes to let the mixture thicken.
-
Pour the mixture into the container in your prepared ice bath.
-
Add any liquid flavorings to the mix, like puréed fruit or vanilla extract.
-
If the eggs scrambled a bit or the mixture is otherwise lumpy, hit it with an immersion blender to smooth it out. You can do this anyway if you want to ensure the smoothest texture.
-
Let the ice cream cure in the refrigerator overnight before churning in your ice cream maker according to the instructions. After churning, it should be a soft serve-like, goopy consistency — it will not have the consistency of finished ice cream.
-
After churning, put into your ice cream storage container as quickly as possible, and let it harden in the freezer for at least 4 hours or overnight. I like a double-hulled container that keeps the temperature more stable, like these Sumo ones. Enjoy!
Banana ice cream recipe:
Take 4 ripe bananas and break them into chunks. Put them in a sealable storage container. Heat up the milk + heavy whipping cream (increase the amounts by about 10% each), and then pour it over the bananas. Put the lid on and let it sit in your fridge for 2-3 days. Then remove the banana chunks. The extra milk and cream accounts for the amount that sticks to the bananas, but weigh it afterward and add some extra milk, if necessary, to bring the total to 800g. Then make the base recipe as usual.
Strawberry ice cream recipe:
Take 450g of fresh or frozen strawberries, and cook them on low on the stovetop for a couple of hours, until they get very jammy. The goal is to cook out as much of the water as possible. Stir in a teaspoon of Tajín.
Then make the ice cream as above, but with the following amounts:
- 60g of corn syrup
- 270g whole milk
- 370g heavy whipping cream
- 3 egg yolks
- 190g of sugar
- 50g skim milk powder
- 1/8 teaspoon guar gum
- 1/4 teaspoon locust bean gum
Once it’s done cooking, blend in the cooked-down strawberries with an immersion blender.
Ginger ice cream recipe:
Take a big hunk of ginger, maybe 200g-ish. Chop it into very small pieces (no need to peel it). Put it in a sealable container with 220g sugar, then let it sit for a day or two. The sugar will draw the moisture out of the ginger and become soupy. Boil it briefly to kill the enzyme that will curdle the milk, then add the milk. Strain out the ginger pieces. Use the remaining milk/sugar combination to make the base recipe above as usual.
Blueberry ice cream recipe:
Similar to the strawberry recipe, take 450g of fresh or frozen wild blueberries, cook them on low on the stovetop for a couple of hours, until they’re cooked-down and jammy. Then make the ice cream with the following ingredients:
- whole milk 400g
- heavy whipping cream 320g
- light corn syrup 45g
- 3 egg yolks
- 1 teaspoon of vanilla extract
- sugar 215g
- skim milk powder 55g
- ¼ teaspoon of Tajin
- 1/8 teaspoon guar gum
- 1/4 teaspoon locust bean gum
How to add chocolate straciatelli to any flavor:
Take half of a dark chocolate bar and about a teaspoon of coconut oil, and melt them on the stove or in a microwave. As the ice cream is churning, slowly drizzle the chocolate into the bowl. The chocolate will harden as soon as it hits the ice cream and break apart into small chocolate flecks.
How to add a swirl/ribbon to any flavor:
Make your ribbon (I like fruit cooked together with corn syrup) and churn the ice cream. As you’re removing your ice cream from the machine and putting it into the storage container, layer in the ribbon. Do one layer of ice cream, one layer of ribbon, one layer of ice cream, etc. Then take a chopstick or butter knife and swirl it back and forth just slightly to spread it around.